Pages

Showing posts with label Nerd Alert. Show all posts

Monday, 3 December 2012

Minecraft Creeper Nail Art & Tutorial! :D

Hi everyone!

I am really excited about my post today! I have a nail art picture tutorial for the minecraft fans out there! Do I even have any minecraft fans who follow me?! Anyway these are my creeper nails and how I did them :) For those of you who aren't minecraft fans, creepers are the worst hostile mobs out there and they will explode and destroy all of your hard work. I have a passionate hate for them. Why did I put them on my nails? I do not know. Perhaps it is an obsession.

This is a picture of a creeper:
Photo source: http://blog.wirebot.com/2011/08/22/10-of-the-most-annoying-game-characters/

I started with base color of Color Club Twiggie, one of my favourite greens.


Then to do the pixels squares I used striping tape from the born pretty store and placed it on my nail in a checkerboard pattern. Then in the squares I applied Elevation Torres de Paines (Darker green) and China Glaze Tree Hugger (Shimmery light green)


This is the result.


Finally I added the creeper faces with a toothpick and a plain black creme. Added topcoat, and voila! CREEPER NAILS! Run!! Light torches!!! Hide!!!


I hope you liked this post!
Thanks for reading!

Saturday, 10 November 2012

Franken Friday!! I call it.... "Come & Claim Him"

Hey polish people! I should have posted this yesterday.. since it is called "Franken Friday" but the news of NL upcoming return had me too excited. Anyway.. onto the post.

Now that I have finished work for the season I have found myself feeling bored and aimless as I search for a winter job. So I have started a new hobby that I am quite enjoying... frankening! It is awesome! Have you ever dreamed of a colour that doesn't exist? Or dreamed of a polish you can't afford/not sold in your area/is discontinued? Well frankening can solve those problems and squash some lemmings while being fun and rewarding too :)

Anyway, this is a polish I made inspired by a Lord of the Rings moment. More specifically the moment where Arwen is riding to Rivendell carrying a very injured and ill Frodo while being chased by the Ring Wraiths. She crosses a river and taunts the Wraiths (who detest water) by saying "If you want him, come and claim him!". The Wraiths advance through the river as she whispers an elvish phrase... calling violent waves in the river forth and washing away the Wraiths. It is a triumphant moment and I made this polish to capture it.

Its a medium to dark blue jelly base with luminosity fine glitter shimmer. Then I filled it with small white circular glitter, medium baby blue matte glitter, and a splash of very sparkly medium sized ocean blue hex glitter. I like to think it captures the violent tumbling waves in the water, with the baby blue squares representing Arwen.


I really like how it turned out. It applies well and its proven to have good wear time.

What do you think of my new franken?

Saturday, 15 September 2012

Dollish Polish The Many Shades of Mr.Grey. A Mani inspired by 50 shades.

Hello!

Today I am sporting a manicure inspired by the book series, 50 Shades of Grey. I'm sure you've heard of it. Hahaha While entertaining, I must admit it is not a writing style I like. I much prefer... you know.. stories with a plot. Well actually I prefer to read more classic books, or even more so fantasy novels. I love me a good fantasy novel (currently into Game of Thrones). It took me practically forever to creep through these three books. But I did eventually (with help from a few long plane rides) and I suppose I did get into it a bit. Haha! Dollish Polish created a very nice polish inspired by Christian, and it is a beautiful polish. A clear base stuffed with.. you guessed it, many shades of grey glitter.

I decided to layer it over grey obviously, Zoya Dove to be exact. I decided to do a glitter gradient in the spirit of the "many shades"of Christian and his development as a character in the book. It applied very well and it is a happy new edition to my stash. I quite liked the way this turned out :)


I think it looks quite chic, even with all the glammy glitter! I hope you like it :)

Sunday, 5 August 2012

Dollish Polish Legend of Zelda Duo!! Hylian Princess and The Hero Of Time Swatches !!! :)

Finally!! It is mine!! The Legend of Zelda Duo by Dollish Polish!! I have wanted these pretties for SO LONG NOW! They were at the top of my lemming list for awhile. I got them through a pre-sale at Overall Beauty! I was one of the first 10 orders so Kim happened to have these in stock! Totally excited and am so happy with them! The Legend of Zelda Ocarina of Time for 64 and Links Awakening for Gameboy are definitely in my Top 10 favourite games ever so I was SO SO happy to finally have these polishes in my grubby little paws. I used to sit in my beanbag chair and play these games for hours... I still do... just not in the beanbag chair... That beanbag chair died with the 90s.

First up is Hylian Princess! Inspired obviously by Princess Zelda. Its got different sizes and shapes of purple glitter, large white and lavender holo hex glitters, and a splash of smaller yellow squares. I think the smaller yellow squares are my favourite part, they remind me of Princess Zeldas hair (as I am player of the older games!) ! Love it :) After much deliberation, I finally decided to layer this over Color Club's Shabby Drab.. the most "powerful" purple I own. I didn't want to discredit this strong princess by making her look too "girly" haha. I thought it looked really good over this smokey, muted purple! Great application, this is two coats.


Next is The Hero of Time, inspired by Link! Green, chartreuse, brown and yellow glitters in a clear base. The glitters are smaller, and more sparse than in Hylian Princess.... and it almost feels more.. manly. Yes.. I am saying that these glitters are manly, just like my Link. I layered it over China Glaze Agro, a metallic-ish deep olive green. Two coats. Next time I might layer it over more of a forrest green :)


Oh man, I loved these. Application was great for both of them. No digging, no fishing. They both spread the glitter nicely on my nails. I used two coats of each for these pictures. I will treasure these for a very long time. I got them from Kim at Overallbeauty.com and she should have more in stock in the coming months!

Have a nice day!

Friday, 3 August 2012

Dollish Polish Super Mario Bros Collection Swatches!!!!!!! *PIC HEAVY*

Hi! I'm super excited about the collection swatches I am showing today! This is the Dollish Polish Super Mario Bros Collection! I am a MAJOR Mario fan, right from the NES. I can totally beat that game in one man, WITHOUT shortcuts. (I did it once hahahaha). I also still regularly play Mario games on my N64 and GameBoy Color. It is always fun, no matter your age. So when I saw the previews for this collection, I KNEW it had to be mine. I set my alarm for 5am and refreshed like a crazy person for an hour to snag this. I even missed the set!!! But I did manage to get all of them individually into my cart!

I'll talk about the formulas and application at the end of the post!

Here we gooooooooo!!!!!!!! *Said in Mario voice*

Here is the main man himself, It's A Me, Mario! Red and blue small and medium hex glitter with the odd holographic star in a clear base. 
(Layered over Julep Pippa, I didn't want to hide the red or blue glitter). 


Now, for his awesome brother, Go Luigi! Blue and green small and medium hex glitters with the odd holographic star in a clear base. A very appropriate book-end for the plumber brothers!
(Layered over Essie Mojito Madness and Joe Fresh Cobalt.. wanted to showcase both the blue and green).


My favourite Mario Kart and storybook character, Dino-Mite Yoshi! I love the pale yellow/green glitter in this one. There is also red and green micro glitter, medium green hexes and medium red squares! There is also a splash of small white glitters. Love this glitter combination.
(Layered over China Glaze Tree Hugger. I really like this combo!)


Next up is 1-UP! Woohoo! An extra man! This one has an abundance of green hex glitter, more sparse white hex and bar glitter, with micro green glitter! 
(Layered over Essence Black is Back. I think it would look epic over a nude too!)


And now for Bowser the bad guy.. The King Koopa! Golden yellow glitter in different sizes, Green and red glitters in different sizes and shapes, as well as black bar glitter and holographic diamonds! This one REALLY reminds me of Bowser. Amazeballs.
(Layered over Color Club Nomadic in Nude. Love love love this combination!)


Next is the female of the bunch, A Peachy Princess! This one is small glitters in lots of different shades of pink (some matte, some shiny, some leaning peach), a splash of holo glitter, and larger light pink squares all in a sheer tinted pink base! I love the glitter combination in this one! 
(I couldn't decide what to layer it over, so I tried a few in the first picture: Essence Black is Back, OPI Alpine Snow, OPI Mod About You, & Color Club Poptastic. Over white you can see the pink tinted base!)


I liked it best over black, so I did a full mani with it. I thought it showed off the glitters the best.


Here is my second favourite Mario Kart player, and the cutest little helpful guy on the block.. Toad-ally Awesome! Mostly different sizes of white hexes, with blue micro glitter, with blue squares and red hexes! My favourite part though is a splash of random yellow glitter in the mix!
(I couldn't decide what to layer this one over. First I tried Joe Fresh Butter, but it sort of hid my favourite yellow glitters!)


So then I tried it over Color Club Lumin-Icent and Color Club Almost Famous. Look at that yellow glitter in there when put over a blue!)


Here is the evil plumber, Wicked Wario! Purple micro glitter, with a splash of yellow and green hex glitters, with white squares thrown in!
(Layered over Color Club Nomadic in Nude. I should have layered this over black, this nude doesn't do it justice at all! The purple glitters are fabulous in person!)


These pictures are all one coat of polish! Some were thinner or thicker than others but they were ALL really well formulated. The only one I might have done one more coat of was Wicked Wario (or put it over black!) They all spread really nicely on my nails and I didn't have to dig or fish for glitter at all with the exception of the stars in Mario and Luigi. It wasn't a huge feat by any means.. just a quick tilt of the bottle. 

I love ALLLLL of these and I don't know if I could pick favourites.. but Dino-Mite Yoshi, King Koopa, Toad-ally Awesome, and A Peachy Princess were the first to really catch my eye! 

These aren't available at Dolly's shop at the moment but I think she mentioned they will make a comeback eventually. I don't think I can even put into words how much I love this collection... the formulas are excellent, the colours REALLY represent the characters, and the collection as a whole is tied together so well. I just love it! An awesome idea executed flawlessly by Dollish Polish! If you love Mario as much as I do, you NEED this!

Monday, 18 June 2012

Galaxy Nails!

After watching all that Star Wars yesterday with my Dad I thought I would do a Galaxy manicure today! What I love about these Galaxy manicures is that I can screw up a ton and you cant tell in the end result :)

I started with Essence Black is Back as my base.. then sponged with Sally Hansen Whirlwind White and went over it with:
OPI Yodel Me On My Cell (blue)
Joe Fresh Bumbleberries (purple)
Joe Fresh Pineapple (yellow)
Then I went over the whole thing with China Glaze Fairy Dust (holo sparkles) to give the look of a starry sparkly sky. Then I did dots for larger stars with Whirlwind White!

Even though I messed up a million times, I still like the way it turned out! I think it does look like galaxies and nebulas on my nails :D


Ouuu spacy! I like it!! Hope you like it too :)

Tuesday, 29 May 2012

Hello Kitty Nail Art :)

Hello! 
Today I have some Hello Kitty nail art on my paws! (Get it? Paws... hahaha).
My sister and I used to love the TV show when we were kids and now we still collect little trinkets and notebooks adorned with Hello Kitty's famous face! She is just so cute and positive :) "Happiness comes in all colours of the rainbow!" (That was against every natural bitter bone in my body). Today I chose the colour pink because that is the colour Hello Kitty wears :)

It was mostly inspired by this cute little hello kitty nail polish I picked up at Old Navy near the cash on sale for $2.00. It doubles as a necklace..(not that I would wear it) and it is obviously meant for little kids.. but I couldn't resist haha! Its a Pink jelly with silver hex glitters but is so sheer it could probably not build up to opacity :(


My index finger is about 2 coats of Milani Gold (I kind of blobbed it around to cover the entire nail).

The middle finger is 2 coats of OPI Mod About You, then I picked hexes out of the Hello Kitty polish with a toothpick and polka dotted them on the nail. Then I added some loose heart glitter I got from online from www.DollishPolish.com

My ring finger is Mod About You again only this time with a white nail art striper I drew the top half of Hello Kitty's face on the tips and added a Bow sticker that came with the Hello Kitty polish. I used a toothpick with black and yellow nailpolish to add her eyes, whiskers, and nose). I got this idea from katikuykuy's photostream on Flickr.

The pinky finger is one coat of Color Club Foil Me Once, a really opaque light pink foil.


Et voila! Hello Kitty Nails! I hope you like them as much as I do :)


Friday, 25 May 2012

Lord Of The Rings Nail Art - One manicure to rule them all.

The Lord of the Rings is in my top 5 favourite book series ever. I read the series & the also The Hobbit when I was about 12 years old and I fell in love with the epic fantasy land of Middle Earth. I have seen the movies literally hundreds of times. I even learned how to speak a little Elvish with a friend in Jr High. No judgement please :D Hahaha!

This is a manicure I have sported several times but I definitely thought it deserved a permanent home on the blog. I first saw it on Billy The Brimes' Tumblr Page originally and I've seen it done incredibly well on The Nailasaurus (one of my very favourite blogs)!

The manicure is the the inscription on the Ring of Power, in the Black Speech of Mordor (where the ring was forged in Mt. Doom) but translated into Tengwar (A script created by Elves originally). Translated into English it means:

One ring to rule them all,
One ring to find them.
One ring to bring them all,
and in the darkness bind them.

Ahh Now I have goosebumps, and I have made myself sound incredibly nerdy. Whatever, I'm okay with that. While the design I saw on the blogs previously mentioned looked absolutely nerd-tastic, I was thinking to myself.. the inscription on the ring only appears when the ring is cast into flame and therefore... I needed to add some flame. It's not perfect but I love it.


Ooouu isn't it pretty?! Anyway this is how I did it.. I started with two coats of a-England Holy Grail, a gorgeous warm toned insanely shimmery gold. I wish I had a macro of this because it is just stunning.. and the perfect shade for the ring of power.


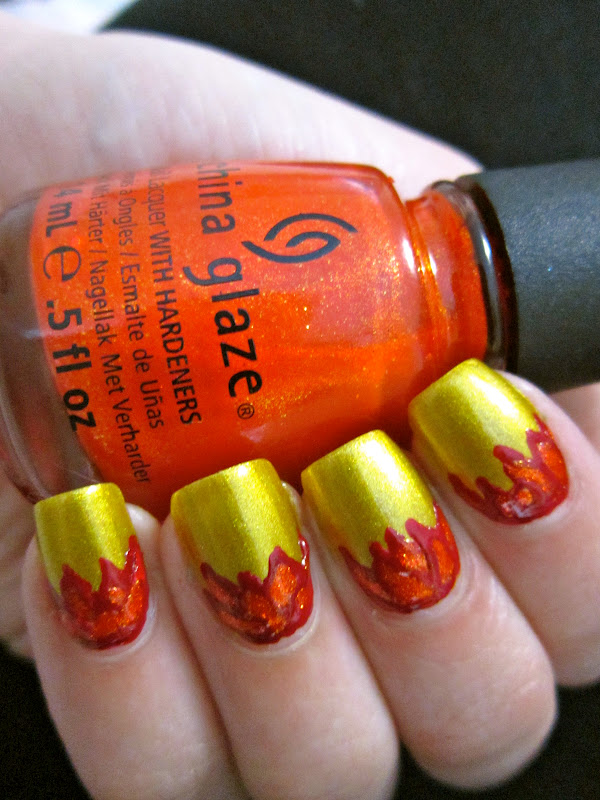
Next with a toothpick I freehanded some outlines of flames with e-England Percival mixed with a little bit of Joe Fresh Cherry. I filled in the holes of the flames with China Glaze Riveting.


Then I freehanded the inscription with black nail polish (can't remember the brand right now) using another toothpick. My lines are a little squiggly because I was a little shaky... I drink far too much caffeine.


Then I waited until I was sure the polish wouldn't drag, and I added some Seche Vite to make it smooth.


This one is in the sun.


 I hope you like it as much as I do :) The puns are endless with this one..
"One manicure to rule them all.."
"10 fingernails forged in the flame of Mount Doom" etc etc Hehehehe
I'm going to wear this for my next big LOTR movie marathon :)